Delirious describes what is affected
TermAn area or monster is Delirious when it is affected by Delirium. Deliriousness is the numbered intensity of that effect. Therefore, 200% Delirious means affected by the maximum 200% Deliriousness.
Endgame encounter and Atlas progression
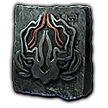
Delirium rewards Liquid Emotions and can lead to Grand Mirrors. Grand Mirrors spread a persistent fog bank across the Atlas. Raise that bank to 100% Deliriousness to create a Simulacrum, then complete seven waves for Raven's Reflection.
Think of Deliriousness as Delirium's difficulty and reward intensity meter. 200% is its maximum setting, not 200% more loot or exactly 200% more monster damage.
An area or monster is Delirious when it is affected by Delirium. Deliriousness is the numbered intensity of that effect. Therefore, 200% Delirious means affected by the maximum 200% Deliriousness.
Deliriousness is the intensity of Delirium affecting the area. A higher percentage makes monsters more dangerous and more resistant through Toughness, can add monsters or Delirium modifiers, and improves monster item drops.
200% Deliriousness does not mean 200% more loot. Current sources do not publish the exact damage, Toughness, rarity, or drop scaling formula, so the percentage must not be converted into an exact reward multiplier.
In a normal moving-fog encounter, Deliriousness rises as the player moves farther from the mirror and caps at 100%. The map boss is always 100% Delirious.
A Grand Mirror fog bank begins at 10%. Killing Rare monsters and map bosses raises the bank for its connected maps. A Simulacrum appears at 100%, but the bank can continue to the 200% maximum.
The current seven-wave Simulacrum starts at 100% Deliriousness on wave 1 and reaches 200% on wave 7.
What changes while building a Grand Mirror fog bank and running its Simulacrum.
Complete connected fog-covered maps to raise the bank. A Simulacrum has not been created yet.
The bank creates a Simulacrum. You may run it now or continue raising the bank.
The Simulacrum is already available, while further Deliriousness continues increasing encounter intensity and monster item drops.
The fog bank has reached its Deliriousness cap. This is a difficulty and reward state, not a 200% loot multiplier.
The seven-wave encounter begins at 100% and ends at 200%. Current published sources give the endpoints but not an exact percentage for every intermediate wave.
The exact difficulty and drop scaling formula is not currently published. The wiki therefore records the verified thresholds and does not invent intermediate Simulacrum percentages or an exact loot multiplier.
The ordinary moving-fog encounter from the mirror to the map boss.
Walk through the Delirium Mirror near the start of the map to release the moving fog and begin the encounter.
Follow the direction in which the fog flows. The progress bar starts at the mirror and ends at the map boss, so moving deeper also moves you toward the boss.
Use the progress bar to find encounter markers. Walk into coloured mirror shards to activate their encounters while continuing toward the boss.
The map boss is always 100% Delirious during the encounter. Kill it before the fog ends, then collect the encounter rewards.
Coloured shards appear at marked depths on the Delirium bar. Walk into a shard to activate its encounter.
These can add modifiers to Rare Delirium monsters, summon stronger and more rewarding monsters, or pause the moving fog.
These can summon a Delirium boss or open a portal to an additional Delirious area such as the Loathsome Mire.
These can add a mirrored boss to the map boss arena or cause a Grand Mirror to appear.
A Deceptive Shard can open the Loathsome Mire. Follow the flowing muck to its central island and claim the Unethical Offering for a special Amulet.
These encounters use fog differently and lead to different progression.
The current Grand Mirror, Simulacrum, and Delirium pinnacle route.
Complete a Delirium encounter to reveal the Delirium hub southwest of the Atlas starting point. Maps around the hub grant Delirium Atlas passive points.
Completing Delirium Mirrors can reveal a Grand Mirror on a nearby map. Its map contains Delirium and a duplicated map boss.
Kill both bosses in the Grand Mirror map, then choose where to spread a bank of Delirium fog across connected Atlas maps. Maps in the bank begin at 10% Deliriousness.
Kill Rare monsters and map bosses in fog-covered maps to increase Deliriousness for the entire bank. At 100%, a Simulacrum map is created. The bank can continue to 200%.
Run the Simulacrum at 100% to 200% Deliriousness. Each wave drops at least one Liquid Emotion, and completing wave 7 awards a Simulacrum unique plus Raven's Reflection.
Bring Raven's Reflection to the broken mirror in the Withered Willow to enter the Paracosm and fight the Raven Trickster. The area owner gains 6 Delirium Atlas points for each victory.
The current encounter starts at 100% Deliriousness and scales to 200% over seven waves.
Map control, Simulacrum access, pinnacle access, crafting, and exclusive unique rewards.

Loathsome Mire reward with two random Instilled Notables and one fewer Prefix slot.

Loathsome Mire reward with two random Instilled Notables and one fewer Suffix slot.
Adds a Mirror of Delirium to maps affected by the Tablet.

Unique Delirium Tablet whose affected maps have fog that never dissipates.
Splinters from Delirium content combine into the Simulacrum map fragment.
Applies to a fog-covered Atlas map at 100% or more Deliriousness to create a Simulacrum.

Drops after completing the Simulacrum and opens the Raven Trickster encounter.
Sockets into an eligible Helmet Augment Socket and adds the Socket-bound Raven-Touched modifier, allowing the Helmet to be Instilled.

Simulacrum-exclusive unique helmet.
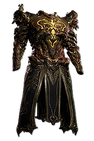
Simulacrum-exclusive unique body armour.

Simulacrum-exclusive unique flask.
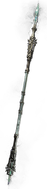
Simulacrum-exclusive unique quarterstaff available from higher difficulty.

Simulacrum-exclusive unique amulet available from the highest difficulty.

Simulacrum-exclusive unique jewel available from the highest difficulty.
Regular emotions are used for Instilling and Basic Jewel crafting. Ancient emotions craft Time-Lost Jewels.
Use three in the listed order for Instilling, or apply one directly to a Rare Basic Jewel.

Used in ordered Instilling recipes and for a guaranteed modifier on a Rare Basic Jewel.
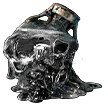
Used in ordered Instilling recipes and for a guaranteed modifier on a Rare Basic Jewel.
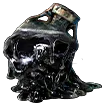
Used in ordered Instilling recipes and for a guaranteed modifier on a Rare Basic Jewel.
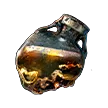
Used in ordered Instilling recipes and for a guaranteed modifier on a Rare Basic Jewel.
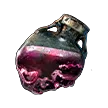
Used in ordered Instilling recipes and for a guaranteed modifier on a Rare Basic Jewel.
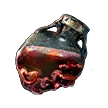
Used in ordered Instilling recipes and for a guaranteed modifier on a Rare Basic Jewel.

Used in ordered Instilling recipes and for a guaranteed modifier on a Rare Basic Jewel.
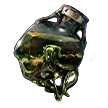
Used in ordered Instilling recipes and for a guaranteed modifier on a Rare Basic Jewel.

Used in ordered Instilling recipes and for a guaranteed modifier on a Rare Basic Jewel.

Used in ordered Instilling recipes and for a guaranteed modifier on a Rare Basic Jewel.
Unlock their drops through the Delirium Atlas tree. They Instill exclusive Notables and craft powerful modifiers on Rare Basic Jewels.

Instills tree-exclusive Notables and crafts a Potent modifier on a Rare Basic Jewel.

Instills tree-exclusive Notables and crafts a Potent modifier on a Rare Basic Jewel.

Instills tree-exclusive Notables and crafts a Potent modifier on a Rare Basic Jewel.
With You can't scare me anymore!, Humanoids can drop Potent Liquid Melancholy, Beasts can drop Potent Liquid Ferocity, and Constructs can drop Potent Liquid Contempt while slain within Delirium Fog.
Apply one directly to a Rare Time-Lost Jewel. Ancient emotions cannot be used in three-emotion Instilling recipes.
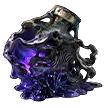
Crafts a guaranteed modifier on a Rare Time-Lost Jewel based on its Jewel base.
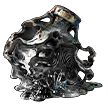
Crafts a guaranteed modifier on a Rare Time-Lost Jewel based on its Jewel base.
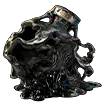
Crafts a guaranteed modifier on a Rare Time-Lost Jewel based on its Jewel base.
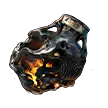
Crafts a guaranteed modifier on a Rare Time-Lost Jewel based on its Jewel base.
Crafts a guaranteed modifier on a Rare Time-Lost Jewel based on its Jewel base.
Crafts a guaranteed modifier on a Rare Time-Lost Jewel based on its Jewel base.

Crafts a guaranteed modifier on a Rare Time-Lost Jewel based on its Jewel base.

Crafts a guaranteed modifier on a Rare Time-Lost Jewel based on its Jewel base.

Crafts a guaranteed modifier on a Rare Time-Lost Jewel based on its Jewel base.

Crafts a guaranteed modifier on a Rare Time-Lost Jewel based on its Jewel base.
These are the Potent Time-Lost Jewel variants. They are not valid Instilling ingredients.

Crafts a guaranteed Potent modifier on a Rare Time-Lost Jewel based on its Jewel base.

Crafts a guaranteed Potent modifier on a Rare Time-Lost Jewel based on its Jewel base.

Crafts a guaranteed Potent modifier on a Rare Time-Lost Jewel based on its Jewel base.
With I know your childhood fears..., Liquid Emotions found have a 20% chance to become Ancient Liquid Emotions.
Every current notable and keystone in the Delirium side tree.



Reference pages used by the Delirium encounter and progression route.
The updates that define the current Delirium and Simulacrum loop.
Added the Withered Willow storyline, the new progress bar and mirror shards, Grand Mirror fog banks, the Trial of Madness, a seven-wave Simulacrum, the Raven Trickster, Jewel crafting, and the revised Delirium tree.
Patch pageMade Simulacrums appear when a fog bank reaches 100%, set Simulacrums to scale from 100% to 200% Deliriousness, and added optional between-wave shards through the Delirium tree.
Patch page